Disclosure: This post contains affiliate links, which means we may receive a commission if you click a link and make a purchase. This comes at no additional cost to you. As an Amazon associate, I earn from qualifying purchases. Please check out our affiliate disclosure for more details.
The thing about making your own wax is you have to be good at following directions. I mean its basically a recipe that you’re cooking up. My first time trying this my sugar wax was too runny. It just ran down my skin, not sticking at all. So rather than give up, it was time to go back to the drawing board. There are a list of problems that can occur when trying to cook sugar wax. It’s either too runny, too thick, too soft, too thick, too sticky (and its hard to get off), or won’t even harden.
Why is my sugar wax too runny?
So, your sugar wax is runny? The simple answer here, my guess would be that you put a tad bit too much water in your wax while you were preparing it. See, when making this sugar wax yourself, there are measurements, measurements that you must follow down to the T.
And if not followed properly, you can expect bad results.
Well, since I am an avid user of sugar wax because it’s one of the best hair removal methods out there. Plenty of benefits and not – so many disadvantages. At times when I’m not purchasing my sugar wax through a retail store or online vendor. I’m making it myself. Sometimes I hit it right on the mark and other times it’s far from a wax that can be used for hair removal.
But when I mess up it tastes good with my whole wheat bread.
Most likely you are in a rush and don’t have the time to make the wax properly. No time, means, you are in a hurry, if you are in a hurry, that means you won’t be able to pay attention. Won’t be able to pay attention, then you won’t follow through properly.
This is a problem
You didn’t add the right amount of water. What we’re trying to make, Juice, perhaps? Or you probably didn’t allow it to cook for the right amount of time. So, you can either add more or less water for next time. Or the one you just messed up on, you can place it back on the stove top and let it cook for a little while longer. Maybe a 1 minute or 2.
Go over the recipe
You can go over the recipe with a fine-tooth comb. Make sure you got your measurements correct. I’m not that very good at measuring it with my eye so, I like to use measuring cups to help me get the right amount.
Here’s a quick recipe you can go over really quick.

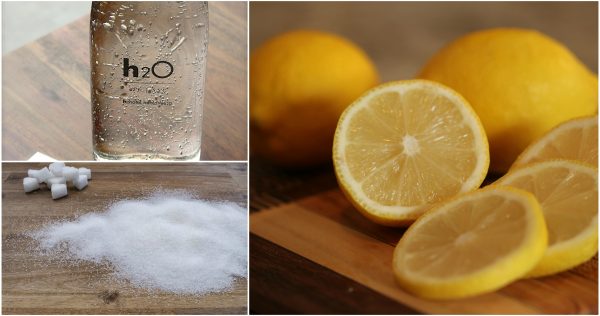
The three important ingredients
- Water (250 grams)
- 2 tablespoons of lemon juice
- 2 tablespoons of sugar
That’s it. Time to make the magic
- Throw every ingredient in a pot or saucepan. Mix it.
- Put the pot on the stove. Turn stove on high. For thirty seconds. Stir the mixture so the sugar doesn’t burn.
- Now turn down the heat, put a lid on the pot. Leave alone for 3 – 4 minutes
- Sugar starts to disappear, so mix it well. Put a lid on the pot, leave for 3-4 minutes
- Now it starts boiling. Stir it some more. Let it boil for another 3-4 minutes
- Stir it again. It should have a yellow amber color to it now. Cover the pot. Wait 3-4 minutes
- Remove the cover from he pot. Pay attention to the color of the sugar. It should have a light brown color like honey.
- Continue boiling it. But on low heat. Don’t cover the pot either. Not this time. Stir it the whole time.
- Turn stove top off. Wax should be ready. Pour it into a container that can hold heat. A mason jar perhaps (that’s what I use). Let it cool for an hour or two.
- Take a piece of sugar wax. Lay it on your body. Start the hair removal process.
Here are a few more recipes.
Hard sugar wax recipe / How to make hard sugar wax
Get your pot, add 250 grams of sugar, doesn’t really matter if it’s brown or white sugar, 2 tablespoons of water and 2 tablespoons of lemon juice, now mix everything to get, it should look like snow when you start to mix it, either white or brown depending on which type of sugar you used. If it’s brown sugar, it should have a brown snowy texture.
- I always like to turn the stove top on for high for at least 30 seconds before I place the pot on the stove. Keep stirring. As you stir, the mixture should start to even out and look real thick milky.
- Reduce the heat, cover the pan, wait about 5 minutes, now stir a little bit, cover it up again, wait another 5 minutes.
- Now it should start to boil a little. Stir it around a little more, leave for another 5 minutes, it should continue boiling and you will notice a slight yellow tint across the mixture.
- Cover for another 5 minutes. Your wax should be covered on top with foam and it should be light brown.
- This is when you can reduce the heat for about 3 minutes. At this point, I don’t want you to stop stirring. But now you can turn the heat off. Wait a few hours for it to cool down.
- The wax color should be a dark brownish color. Almost like Pepsi or coca cola soda.
How to make sugar wax in your microwave
Just mix everything together. In a bowl of course. Pop it in the microwave. Make sure that your microwave is on high setting if you have those type of settings. Microwave it for 2 minutes. 2 minutes is up.
Now stir it up a little. Beware to scrap the bottom of the bowl also when you’re stirring it, this way nothing burns.
WE ARE NOT DONE YET. Pop it back in the microwave for 1 minute then take it out and stir a little.
This is the tedious part.
- You’re going to do this a few times until the mixture changes its color. If it starts to smoke, take it out immediately. When you notice it turns to a dark amber looking color (like honey), then you’re ready.
- Take it out and let it sit for a while. What I find helpful is placing it in an ice bath. Just fill a bowl with ice and water and put the sugar paste in it.
- Make sure when you place it in an ice bath you are using a shatter resistant container. Preferably Pyrex because a glass container may shatter when it meets the ice water.
- You’ll want to play around with it with your spoon as it begins to cool down. Start to twirl it around while scraping it to one side of your bowl. When its cool enough for you to touch it, you can scoop it out into your hand (make sure your hand is wet or damp).
- Wet the other hand also. You can knead the wax until it changes its color into a more golden fried chicken color.
- You can pick off a piece of wax now and put the other part in an airtight container and place it in the fridge.
Sugar wax without lemon … instead, you have Sugar wax with apple cider vinegar
Yes, you can make sugar wax without a lemon. It’s necessary that you use an acid because the lemon itself is an acid. You can replace an acid with an acid. So, get a hold of some apple cider vinegar (white or brown) doesn’t matter. Take that same 2 cups of sugar, now a ¼ cup of apple cider vinegar and ¼ cup of water. Now do the same process as before.
Sugar wax with xanthan gum
You can follow the exact same steps up above, but this time throw in some xanthan gum. This is more of a thickening agent. So, if you have problems with making the sugar wax thick enough, instead of using less amount of water. Use the same amount of water the directions I wrote stated. And throw in 1 tablespoon of xanthan gum.
So, the instructions would go something like this.
- Get yourself 2 cups of white cane sugar
- ¼ cup of lemon juice
- 1/8 cup of water
- And then the 1 tablespoon of Xanthan gum
Or you can add guar gum
Both are thickeners. Guar gum is mostly used in your food for baking. Xanthan gum can lessen the hardness of the sugar wax. Remember the original ingredients with sugar, water, and lemon and how you can eat it. I wouldn’t even try to eat the guar gum or xanthan gum. The guar gum was known to give your stomach a fuller feeling, it was essentially a diet aid. But it can mess up your intestines.
Sugar wax without lemon … instead, you have Sugar wax with apple cider vinegar
Yes, you can make sugar wax without a lemon. It’s necessary that you use an acid because the lemon itself is an acid. You can replace an acid with an acid. So, get a hold of some apple cider vinegar (white or brown) doesn’t matter. Take that same 2 cups of sugar, now a ¼ cup of apple cider vinegar and ¼ cup of water. Now do the same process as before.
Tired of making sugar wax yourself
Then you can always buy sugar wax. Believe me making sugar wax is an absolute money saver but can be time consuming if you don’t get it right the first couple of times. There here are a few trusted sugar wax products I’ve used in the past and you can try for yourself.
Sugaring NYC Sugar Wax Hair Removal Kit: These guys have a good product on their hands. It’s organic but what sugar wax isn’t.
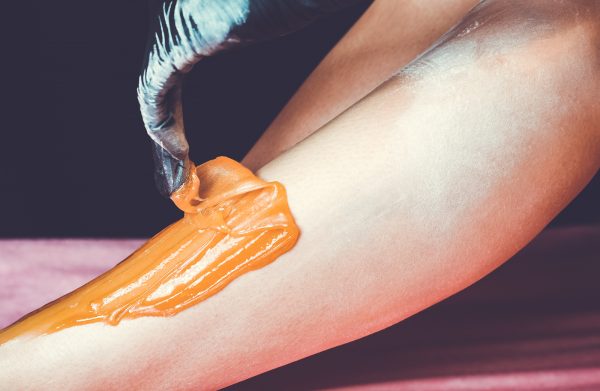
The next recommendation is a firm sugar wax. MyGoldSugar. This is perfect because they specifically made for the “flick technique method.” I speak a little more about it down below near the picture of the hand filled with wax. Its just a way for you to remove the wax itself off your body.
You take it. Warm it up for about 10 seconds, then your ready to go. Try them out in case you’re tired of preparing the wax yourself.
My sugar wax is too hard, what happened?
You let your sugar wax become overcooked. You overcooked the wax by letting it sit in the pot for way longer than it should have. Keep the sugar wax cooking process to a 5-7 minute minimum.
Sometimes you may need to adjust the stove top burner, but mostly you will have to do this by eye. Pay close attention to the color. Once it starts to get too dark, you know you may be doing something wrong.
How do you rescue sugar wax that came out too hard?
You can start by adding 2 tablespoons of water. I mean just dump it to your sugar paste. Or if your sugar paste is in a jar, sometimes I make a little hole with my spoon and drop the 2 tablespoons of water right into it. I’m just eyeballing it. Not really using any sort of measurements.
But if your wax comes out too hard.
- Then you can add more than 2 tablespoons of water.
- Now the trick here is to microwave it for 20-30 seconds. I want you to microwave it till it has a liquid consistency. Matter of fact you know the consistency of syrup. That’s how you want it.
- Now stir it. And stir it some more
- Okay, now you’re done stirring. Let the wax cool itself down till it’s at a room temperature or you can dip your hand in it and make sure it’s spreadable and still not too hard like how you started out.
Sugar wax hardens too quickly and how to reheat sugar wax
If you find yourself with sugar wax hardening a tad bit too quick, then you must reheat it to loosen it up. One way I like to loosen it up by placing in a mason jar, put that jar in a pan of hot water. Another thing you can do is place your jar in a microwave. Turn on the defrost setting. Heat it up, but not too much. Make sure you check it.
Here are some ways to reheat the sugar wax
How to reheat sugar wax?
By now you should be storing it in a mason jar. Put that jar in the microwave. Now here’s the tricky part because if you don’t pay attention to the time you have in the microwave. That could seriously melt it. So, I would microwave it for 10 seconds and check it. If it’s too stiff, microwave for another 10 seconds. I call it the 10-second interval. Keep doing this until you have the desired texture. It shouldn’t be too runny or too stiff.
But you have to be careful when you use the microwave. Because if you’re not careful you can create a homemade goo. You can overheat the paste easily. The microwave heats up the core of the paste while it’s inside the container. Then the outer layer of the container is cold. The microwave also heats up some of the moisture in the paste and can leave it a lot harder than it started.
How to reheat sugar wax without a microwave?
The only obvious method is to put it on the stove top. Put some cold water in a pot and put it on medium heat for 5-6 minutes. You can check the temperature by dipping your finger in it. And make sure it doesn’t cause any burns. Put the jar in the water. The water should cover the jar up to the lid. Make sure the jar is closed properly because you don’t want any water in the jar. Let the jar sit in warm water for 8 – 10 minutes.
The only obvious method is to put it on the stove top. Put some cold water in a pot and put it on medium heat for 5-6 minutes. You can check the temperature by dipping your finger in it. And make sure it doesn’t cause any burns. Put the jar in the water. The water should cover the jar up to the lid. Make sure the jar is closed properly because you don’t want any water in the jar. Let the jar sit in warm water for 8 – 10 minutes.
Why my sugar wax won’t thicken?
One word: Too much water. Alright, not exactly one word. But you get the picture. You’ve added too much water. You must keep on boiling it until it has a thick consistency. On a candy thermometer you would be able to tell because its at the “soft ball stage”. Or if you’re going by your eyesight it would be an amber color.
Your best bet is to start over and use a better recipe. Read the recipe closely. Get a measuring cup if you can’t tell the proper measurements by eyesight.
How do you thicken sugar wax?
- If you’re trying to thicken the sugar wax, you probably added to much water, to begin with. So, to clear this up you can add more sugar, till the consistency thickens.
- And next time you make sugar wax add less water than you did before. While you’re cooking it, watch for it when it boils. And make sure it gets thick.
- To do this it would be a lot better if you had a candy thermometer. Wait for the boil to get to the softball stage, which can be found on the thermometer. The temperatures and stages for certain food should be located on the thermometer. You would look for the temperature/stage for candy which is similar to that of sugar wax.
Why isn't my sugar wax hardening?
Because you haven’t let it sit long enough to cool down and harden. When sugar wax is being cooked it is a gooey mess and can be played around with easily with your hands.
So, you must let sit for a while, then when it cools down it hardens.
If you want it to harden real quick a nice trick you can use is to put it in the freezer for about 15-25 minutes. It’ll harden pretty quick after that.

Why is my sugar wax getting stuck on my skin (Can’t flick it off)?
There are a couple of reasons why this also may happen.
One reason may be that the weather is too hot.
There are always different types of sugar wax. Hard, soft, medium soft, etc. If you find yourself in a warm area, the paste you’re using for your sugar wax should be thicker and harder. Basically, cook it a little longer.
Wrong paste, wrong area
Sometimes you will need a harder paste. Harder consistency. Depending on the bikini area or inner thigh, those areas may be hotter than other parts of your body, thus the need for a more tougher paste. You can try and cook the paste a bit longer.
The consistency of your sugar wax changed.
Sometimes you would need a whole new ball of sugar wax. Sometimes the consistency changes when you try spreading it over large body part areas, the sugar will be hell to work with.
Your sugar wax has created a sticky and messy situation, how to get out of it?
Tips on how to get out of it
Sometimes you got to work with it. You made it. It’s your creation. Sometimes when I make a batch, honestly it may too runny to wax my leg or any other body part, I work it in. If it’s really sticky, then leave it there for a while. And work with it.
If you are using a stick to apply the wax, then leave the paste on you for a minute, then go over it again with the stick to pick up piece by piece.
Next solution: You can use wax strips to help along with the sugar waxing. This is also a great solution because wax strips come with pre-applied wax on them. You place the wax strip on the area with the sticky paste, it’ll latch on to it. It’ll help remove it.
If all else fails, you can use water. Water is a trick for some problems with wax. You can take a warm bath, shower, or you can run some hot water on the area, it’ll help to loosen it up, then you can remove it. But depending on how much of the paste is on your skin, you might be working it a while.
Your flicking technique isn’t that good.
There is this rap song where one of the lyrics goes like this “all in the flick of the wrist.” Guess where I’m hinting at. Your flick-off technique is not that good. Sometimes you’re just not flicking your wrist hard enough to remove the sugar wax. Therefore, if you have bad wrist along with bad flick technique, removing the wax will be hell.
Last tip: try taking a small ball of your sugar wax and place it on the runny sugar paste. Make sure the new ball of wax you got is a lot thicker and much harder. Once you place it on your skin. Try to lift it off the regular way you would.
Further Reading:
I would always prefer sugar wax when compared to regular hot wax. In this article,It lists the benefits of sugar wax. And as a user of this type of wax. This article marks every check in the box. They are right.
I also wrote a deeply informed article on sugar waxing your underarms. Maybe you’ve had problems with your sugar and can apply this new knowledge you got from reading this article when you go to wax your underarms
TIPS AND TRICKS
The best way I’ve found to test and make sure the wax is ready is by making a bowl of water and ice. Once the paste comes off the top (or when you think the paste is done cooking). Grab a spoon, dip it in the paste, then into the ice water, pull it out.
Check to see if the paste that is stuck on the spoon and if it can be moved and molded with your fingers. If yes, then (guess what) you’re done. Cooking is complete. If no, then you’re not done. Put it back on the stop to boil a little longer.
This came from a friend of a friend of mine, that is known to cook candy for her children and children’s friends. And this is her way of testing if the candy is ready or not.
Now you should have the perfect consistency to your sugar wax, but how do you reuse sugar wax. This is how.
Sometimes you’ll have some sugar wax left over, but you’re not going to throw it away, are you? No! We can save it and use it for another day. You can reuse sugar wax either by reheating it via microwave, stovetop, or leaving it out on your counter at room temperature.
Conclusion: Your sugar wax being too runny is a natural thing to experience. It happens. But luckily for all of us sugar wax users, its a easy and reconcilable thing to fix. Only when you fix it, you’ll be able to enjoy the wonder of sugar wax


